
OpenSkyPlus2 — Installation Guide
Version: 2.0.0 · Developer: eKsiSLe · Project: github.com/OpenSkyPlus2
TL;DR : Run the installer as Administrator, point it at your
C:\SkyTrak folder (or let it install SkyTrak for you), finish, then launch “SkyTrak (as Admin)” from your desktop. That’s it.
What this installer does
Finds (or installs) SkyTrak
- Auto-detects existing installs in
C:\SkyTrak,Program Files\SkyTrak, etc. - If SkyTrak isn’t found, you’ll be offered to download and run the official installer (5.8.27) directly from SkyTrak’s Downloads page. Auto-downloads and installs.
Targets the right versions
- Supported SkyTrak app family: v5.4 (beta6) – v5.8 (beta7+) (latest known build: 5.8.27).
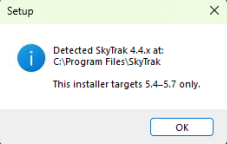
- SkyTrak 4.4.x is blocked (Mono era). Please update to 5.x.
Relocates to C:\SkyTrak (optional)
- If your install lives under Program Files, you’ll be prompted to move it to
C:\SkyTrakto avoid Windows write restrictions.
Keeps your stuff safe
- If a
BepInExfolder already exists, we’ll offer a timestamped backup:BepInEx.backup.YYYYMMDD-HHMMSS.
Creates helpful shortcuts
- SkyTrak desktop icon with the OSP2 logo (runs SkyTrak as admin, which some setups require).
- Start-menu links to this guide and to open the BepInEx log in Notepad.
Optional firewall opening
- Task: “Open Windows Firewall for GSPro OpenConnect” opens inbound TCP
921.
Requirements
- Windows with admin rights (installer must run elevated to move folders).
- SkyTrak app v5.x (the installer can fetch and install it if missing).
- Enough disk space to copy SkyTrak if you choose to relocate it to
C:\SkyTrak.
Quick install
- Close SkyTrak if it’s running.
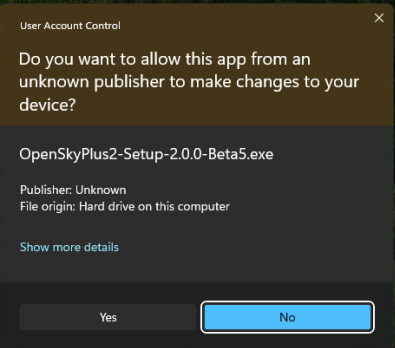
- Run as administrator. It should run as one by default, but if not, to run as administrator, right-click the installer and choose Run as administrator.
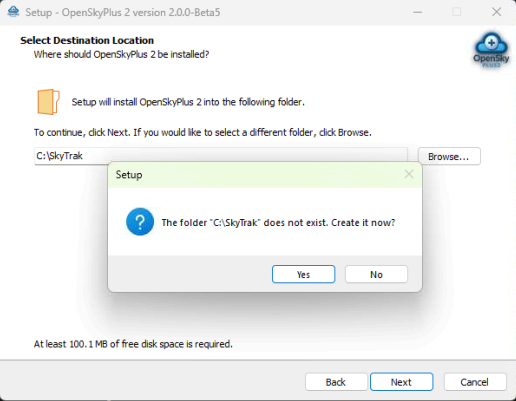
- When asked for the SkyTrak folder, pick
C:\SkyTrak. If SkyTrak isn’t installed, click Yes when prompted to download and install it automatically. - If offered, allow relocation to
C:\SkyTrakfor fewer Windows permission issues. - If prompted, allow the installer to back up existing
BepInEx. - (Optional) Select the firewall task to open port
921for GSPro OpenConnect. - Finish. A README will open. Use the desktop shortcut SkyTrak (Admin) to launch.
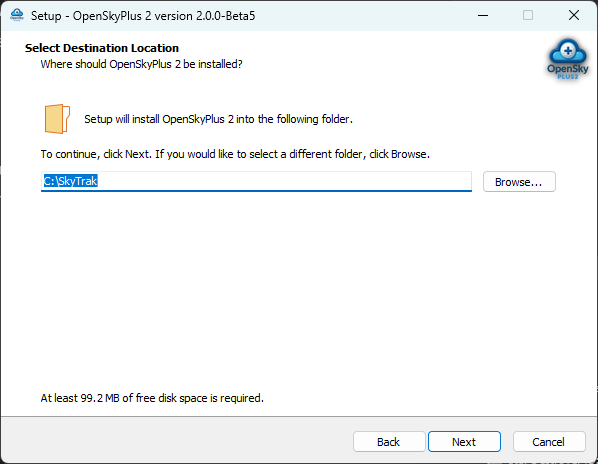
C:\SkyTrak (recommended)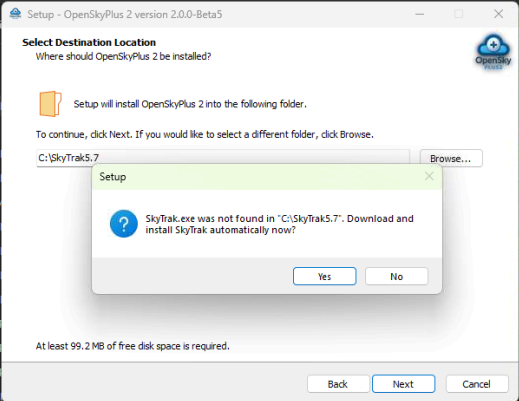
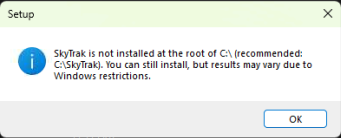
C:\SkyTrak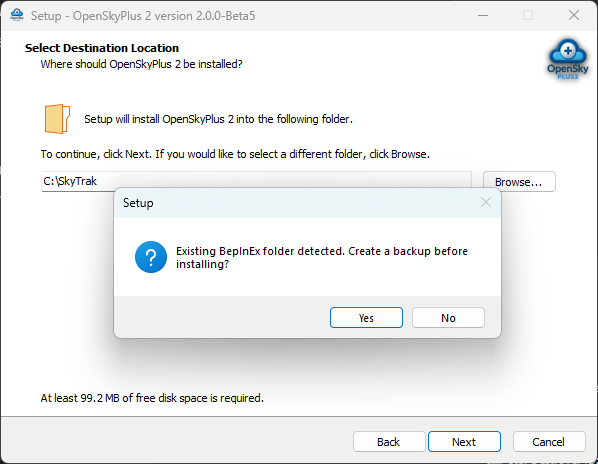
BepInEx before installingAfter install
- Launch using the desktop icon (the OSP2 logo) SkyTrak (Admin).
- Open logs via Start Menu → OpenSkyPlus2 – Open LogOutput.log (file:
SkyTrak\BepInEx\LogOutput.log). - If you created a backup, it’s inside your SkyTrak folder as
BepInEx.backup.<timestamp>.
Troubleshooting
“SkyTrak 4.4.x detected”
Update the SkyTrak app to 5.x. The installer targets 5.4–5.8 only. If you need help, let the installer perform the official download & install for you when prompted.
“SkyTrak.exe not found”
Pick the folder that contains SkyTrak.exe. Typical locations:
C:\SkyTrak(recommended)C:\Program Files\SkyTrakC:\Program Files (x86)\SkyTrak
If you don’t have it, choose Yes when asked to install SkyTrak automatically.
Relocation failed
Make sure SkyTrak is closed. The installer tries
robocopy first, then xcopy. If copying still fails, move the folder manually to C:\SkyTrak and re-run the installer.
Firewall / GSPro connection issues
- Re-run the installer and select the task “Open Windows Firewall for GSPro OpenConnect (TCP 921)”.
- Or run as admin:
netsh advfirewall firewall add rule name="GSPro OpenConnect" dir=in action=allow protocol=TCP localport=921.
Antivirus/Defender blocked the installer
This setup writes to the SkyTrak folder and creates a launcher script. Temporarily allow/whitelist the installer if your AV is aggressive, then re-run as Administrator.
Where are things installed?
- SkyTrak folder: usually
C:\SkyTrak(recommended). You may be prompted to relocate it there. - BepInEx & OpenSkyPlus2 files: inside the same SkyTrak folder (
{SkyTrak}\BepInEx\...). - Backups:
{SkyTrak}\BepInEx.backup.YYYYMMDD-HHNNSS. - Uninstaller: “OpenSkyPlus2” in Apps & Features, or run the standard uninstaller.
Uninstall / Reinstall
- Uninstall OpenSkyPlus2 from Windows “Apps & Features”.
- Any backup folders remain in place; the uninstaller will offer to open them afterward.
- To reinstall, just run the new installer and follow this guide.
Need help? Reach out to eKsiSLe on the SGT discord. If you’d like to support development: Buy Me a Coffee.